Struggling with labels falling off your frosted plastic bottles? You are definitely not alone. It is the silent killer of packaging line OEE (Overall Equipment Effectiveness).
In this definitive guide, I am going to show you the exact packaging engineering framework to permanently stop label peeling on Low Surface Energy (LSE) containers.
But simply swapping out your adhesive is only half the battle. To truly safeguard your supply chain, you must understand the mechanics of high-speed application and the true cost of failure. Let’s dive into the technical reality of modern label printing.
1. The 48-Hour Troubleshooting Matrix

When your 300-bottle-per-minute production line halts, the supplier blame game begins immediately. The manufacturer blames the bottle, the bottle supplier blames the label, and procurement is caught in the middle. Identifying the exact time the label fails provides the quickest path to a reliable, data-backed solution.
Use this diagnostic matrix to pinpoint your application problems based on when the peeling actually occurs:
- ⏳ Phase 1: Instant Curling During Application (0 Minutes)
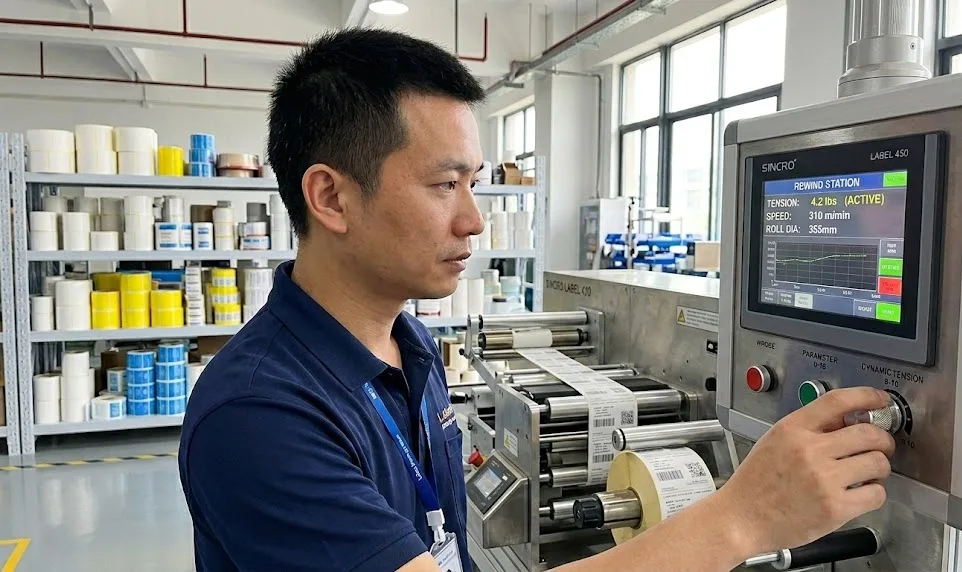
If your labels fly off or curl the moment they leave the dispensing plate, your adhesive is likely not the problem. This is typically a mechanical mismatch. If your automatic labeling machine runs at high tension, the release liner force must be precisely calibrated (ideally under 15 g/inch). When the release tension is too tight—often caused by a supplier die-cutting just 5 microns too deep and damaging the silicone liner—the sheer force of high-speed peeling fractures the adhesive’s microscopic structure before it even touches the plastic. - ⏳ Phase 2: Edge Lift Within 2 to 4 Hours
This specific timing points directly to a failure of facestock conformability. If you apply a rigid 3 mil PET material to a frosted bottle with a tight radius of curvature, the mechanical memory of the thick plastic fights back. The facestock desperately wants to return to its flat state, and this physical pull easily overpowers the initial tack of your adhesive. - ⏳ Phase 3: Complete Delamination After 24 Hours
Delayed peeling usually indicates chemical contamination or a disrupted curing environment. Invisible mold release agents left by the bottle manufacturer act as an impenetrable barrier. Furthermore, moving newly labeled frosted PE bottles directly into a cold warehouse interrupts the critical 24-hour dwell time curve, virtually guaranteeing edge lift.
“Surface contact is fundamental to adhesive performance. Firm pressure must be applied to increase flow. Time and temperature are not optional; they are structural requirements that exponentially increase surface contact and ultimate adhesion values.”
— Engineering Guidelines, Industrial Adhesives Division
2. The Physics of Adhesion: Mastering the 10-Dyne Rule
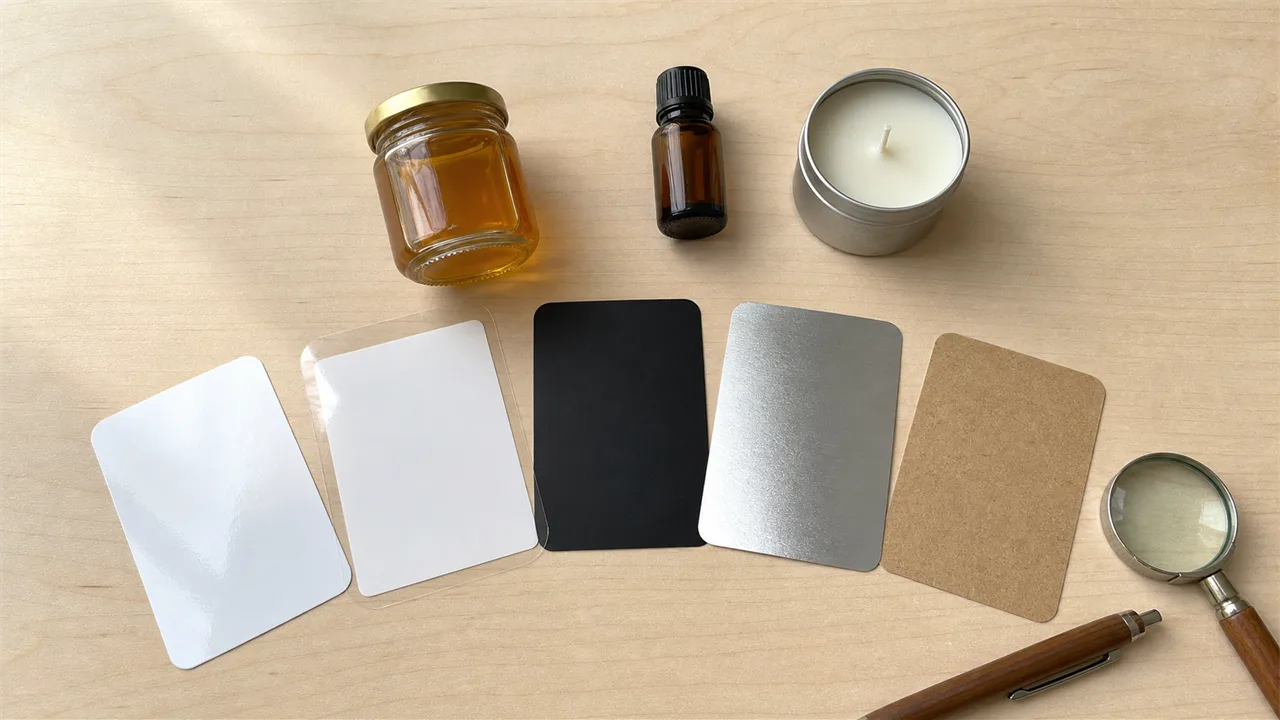
You might wonder why the standard premium adhesive that worked flawlessly on your glass jars fails completely on your new frosted polypropylene (PP) containers. It all comes down to the 10-Dyne rule.
Untreated PP and PE sit dangerously low on the surface energy spectrum, typically registering at 29 to 33 dynes/cm. When the liquid adhesive’s surface tension is higher than the plastic’s surface energy, it creates a “Teflon effect.” The adhesive beads up instead of flowing into the microscopic valleys of the frosted surface.
The Golden Rule: To achieve proper “wetting out,” your adhesive’s surface tension must be at least 10 dynes/cm lower than your plastic container’s surface energy. True adhesion requires molecular-level entanglement, which is thermodynamically impossible if the adhesive cannot intimately wet the substrate.
Data Matrix: Surface Energy Compatibility
| Material Type | Surface Energy (Dynes/cm) | Adhesion Difficulty | Mandatory Adhesive Strategy |
|---|---|---|---|
| Glass / Metals | 250+ | Low | Standard Acrylic PSA |
| PET / PVC | 36 – 45 | Medium | High-Tack Acrylic |
| Polyethylene (PE) | 31 – 33 | High (LSE) | Modified Acrylic (Thick Coat) |
| Polypropylene (PP) | 29 – 31 | Extreme (LSE) | Specialty Rubber / Modified Acrylic + Treatment |
3. The “Machine-Ready” Engineering Standard
You might assume that if your labels pass a static laboratory adhesion test, they are ready for production. However, many premium labels fail because they are not engineered for the physical violence of an automated packaging line or the extremes of international shipping.
We recently handled a crisis involving an urgent sunscreen order for a major European beauty brand. The procurement director did everything “by the book”: they specified a top-tier modified acrylic adhesive and required corona treatment to raise the frosted HDPE bottles to 40 dynes/cm.
The Failure: Despite these precautions, their 250-bottle-per-minute line experienced a 5% failure rate right out of the dispensing plate. The situation escalated during low-pressure air freight to Europe, resulting in 15% of the labels suffering severe edge lift upon arrival.
The Real Root Cause (Mechanical, not Chemical):
1. Die-Cutting Depth: The previous converter cut just 5 microns too deep, scoring the silicone liner. At 250 BPM, the release tension fractured the adhesive layer during separation.
2. Rigid Memory: The client used a rigid 3 mil PET facestock. When the HDPE bottles expanded slightly during air freight, the rigid PET could not stretch. Its mechanical memory violently pulled the damaged adhesive off the frosted surface.
The Fix: We calibrated the dynamic release force to exactly 10-15 g/inch and switched to a flexible MDO film to absorb container deformation. Zero failures reported since.
4. Upstream Poka-Yoke Design for Packaging
If your current adhesive technology has reached its absolute thermodynamic limit, the most effective strategy is to eliminate the problem before it reaches the production floor. By modifying the physical structure of your low surface energy containers during the initial mold design phase, you can bypass chemical challenges entirely.
Implement these three structural safeguards:
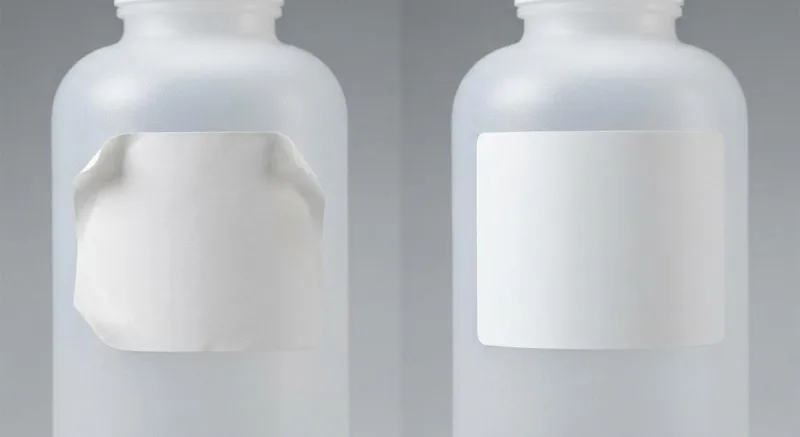
- Implement a Labeling Window: You do not need to apply a frosted finish to the entire container. By instructing your bottle manufacturer to leave a smooth, high surface energy rectangle exactly where the label will sit, you instantly reduce your failure risk by 90%.
- Utilize Recessed Label Panels: Industrial drums and cosmetic containers endure significant physical friction during global transit. Engineer a slight 0.5mm indentation into the bottle mold. The label sits just below the highest point of the container wall, creating a physical barrier that shields delicate edges from scraping.
- Beware the Taper Trap: Even a microscopic one-degree taper on a cylindrical plastic bottle radically changes application physics. Applying a standard rectangular label to a tapered container at high speeds guarantees tension wrinkles. You must design a specific curve-cut label shape to neutralize mechanical stress.
5. Evaluating Total Cost of Ownership (TCO): A Procurement Guide
How do you convince your executive board to approve a specialized, engineered label that costs 15% more than your current generic supply? You must forcefully shift the conversation from simple Unit Price to the Total Cost of Ownership (TCO).
Procurement managers face extreme pressure to cut initial costs. However, saving half a cent on a standard BOPP label becomes a catastrophic financial decision when it triggers hidden manufacturing disasters.
TCO = Label Unit Price + (Downtime Cost per minute × Total Downtime) + (Scrap Rate × Cost of Ruined Product)
In a high-speed manufacturing environment, downtime easily costs between $100 and $300 per minute. When label peeling forces your team to stop the line, or ruins expensive cosmetic formulations packed inside frosted containers, the financial bleeding is immense. Let’s look at the real math for a 100,000 bottle run:
Financial Visualization: The “Cheap Label” Trap (100k Run)
| Cost Component | Standard Sourcing (Unit Price Focus) | Engineered Sourcing (Machine-Ready) |
|---|---|---|
| Label Unit Price | $0.02 ($2,000 Total) | $0.024 ($2,400 Total) |
| Line Downtime (est. $150/min) | 120 mins = $18,000 | 0 mins = $0 |
| Scrap Rate (Product Value $5) | 5% (5,000 units) = $25,000 | 0.1% (100 units) = $500 |
| True Total Cost | $45,000 | $2,900 |
To secure this level of quality, stop using vague language on your purchase orders and instead mandate audit-proof engineering specs that define both adhesive chemistry and regulatory compliance requirements.
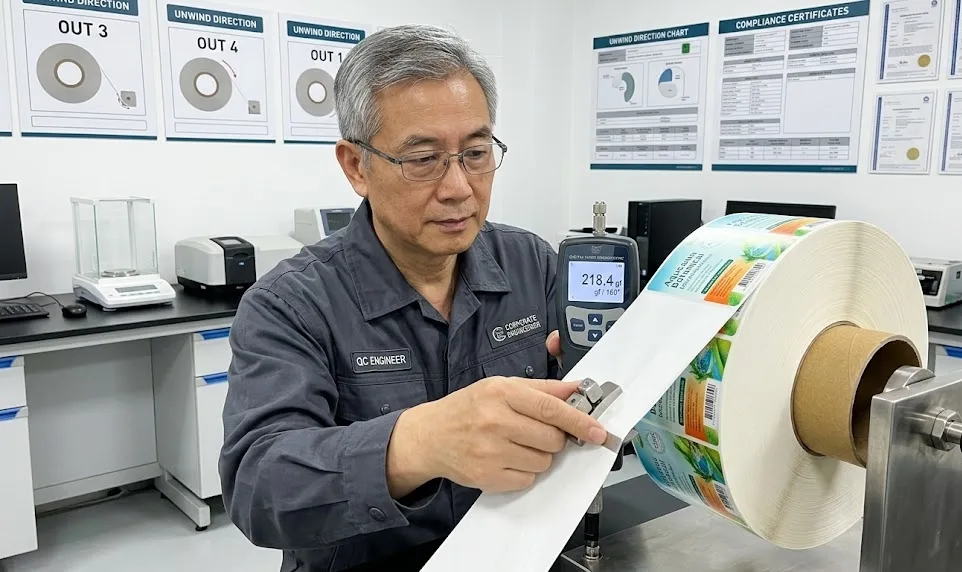
Draft an airtight technical specification sheet locking in absolute parameters: Minimum Application Temperature (MAT), Verified Peel Strength (FINAT FTM 1 standard), and Mandated Release Force Calibration.
6. The 72-Hour Destructive Factory Test
Agile supply chains cannot afford to send every new batch to a third-party laboratory. Your quality control team needs a scientifically sound, destructive testing protocol executed directly on the factory floor before signing off on a massive production run.
Execute these three uncompromising checks:
- The Thermal Shock Test: Apply labels and observe the 24-hour dwell time. Place containers in a 50°C hot box for 12 hours, followed immediately by 12 hours in a -20°C freezer. Inspect edges under magnification. Any adhesive creep or micro-lifting means the labels will fail maritime or air freight.
- The 100-Squeeze Fatigue Test: For PE squeeze tubes, have an inspector aggressively squeeze the container 100 times to simulate consumer lifecycle use. If the facestock lacks 10-15% elongation capacity, you will instantly see white stress marks and delamination.
- The IPA Control Group: Wipe one set of bottles with 99% isopropyl alcohol; leave a second set untouched. Apply labels to both. If the untouched bottles peel significantly easier after 24 hours, your bottle manufacturer is leaving heavy mold release agents on the plastic.
Stop the Supplier Blame Game Today
Stop letting your production line serve as a free testing ground for unreliable suppliers. Take control of the physical variables—from die-cutting tolerances to facestock mechanical memory, a technical rigor just as vital for those following a manual labeling guide for short-run projects.
Don’t rely on guesswork; use data-driven engineering to protect your brand assets.